Green Tomato Pie
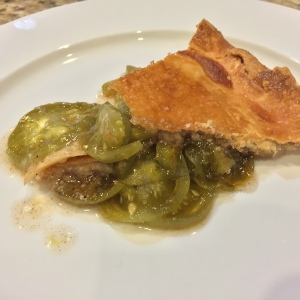
I was curious as to what this could be—tomatoes, in a pie? But after making it, I can tell you, it is delicious. The tomatoes simply act as a wonderful fall fruit, somewhere between a plum and an apple. The traditional apple pie spices and the golden raisins work very well together, and result in a delicious fall pie that—if you closed your eyes—you would think was a sweet apple pie.
Author: WooPigFoodie
Recipe type: Dessert
Ingredients
- 6 cups green tomatoes
- Refrigerated pie dough, 2 rounds
- 1 ¼ cups white sugar
- 2 ½ tablespoons minute tapioca (look for this in the baking aisle—you want the smallest white pellets. If you get large ones, you can grind it into a powder in your spice grinder.)
- 1 tablespoon grated orange zest (any orange; we had mandarin oranges in the house)
- ½ teaspoon ground cinnamon
- ⅛ teaspoon freshly ground nutmeg
- ¼ cup golden raisins
- 1 egg white, beaten
- ¼ cup sugar
Instructions
- Preheat your oven to 425 degrees, and place a metal baking sheet pan in the center of your oven.
- Slice up your green tomatoes nice and thin. I sliced these no thicker than ⅛”. You certainly could go thicker, but these have the skin on and I wanted to make sure that they could be cut through very easily with a fork, so I kept them thin.
- Roll out your pie dough and fit it into the bottom of a 9” pie plate.
- Starting from the outer edge of the pie, ring the tomato slices around and around filling from the outer edge to the middle, and then starting over.
- Go up at least ¾ of the height of the pie. I like full pies, and like any fruit, these will shrink down as they cook. Fuller is better!
- In a bowl, mix together the first 1 ¼ cups white sugar, the tapioca, grated orange zest, cinnamon, nutmeg and raisins. Pour that over the pie.
- Carefully place your second pie dough round on the pie and crimp the edges together so that they are sealed. Cut off any extra pie dough that is left on the edges after the two rounds are pressed together at the rim.
- Take an egg, separate the yolk out and save for another use. Mix up the egg white a little bit to break down any long protein strands, and then brush the egg white across the pie. I use a silicone brush for this. You can use a piece of paper towel folded into a long 1” thin strip that you dunk and brush with.
- I do brush the edges of the pie, because I will end up covering them about 15 minutes in. If you don’t have a pie edge protector or enough tinfoil handy to make one, don’t put egg on the rim of the pie—it will brown far before the rest of the pie and you won’t like how burnt that will taste in the end. (To make a tinfoil pie edge protector, take a 2 foot sheet of tin foil, cut it down the middle so that you now have two 2 foot sheets that are narrower, and fold each sheet so that it is about 2” wide. Curve each into a half moon shape—equal to the size of a half pie. You will drop those gently over the top of the pie after the pie edges are nicely browned.)
- Once you have covered the pie with the egg white, dust it with about ¼ cup of white sugar. Get it all over the pie, nice and thinly. Those two ingredients will make the top of the pie brown very nicely, and give it a light flaky crunchy sweet crust. You will look like a pie hero. (That’s what, the fifth kitchen secret. It’s pretty rare that I give more than a two-fer in one recipe!) Cut a series of steam vents in the top. I like the star shape but there’s no magic to this—any number of slits or shape will do.
- Set the pie in your oven on top of the hot baking sheet. Be careful!
- Let this cook about 15 minutes or so. Once the edges of the pie are just browned, put on your pie edge protector. Note that you do not have to push the pie edge protector down onto the pie. You can just set it on the edges. The same goes for the tinfoil edge protector, if you are using it. Don’t burn yourself by trying to get it perfectly on the edges; just place it above the edges. So long as it blocks the heat coming down from the top of your oven, your job is done.
- Let this cook until the center of the pie is nice and golden brown. It took me about 40 minutes. If you are getting a really browned top but you haven’t cooked this anywhere near 40 minutes, crank down your oven to 350 degrees, open your door for a minute to help it get there, and then ride it out for at least a total of 40 minutes.
- When you have it nicely browned, pull it out of the oven to rest. Give it about 45 minutes to an hour to rest. This allows the tapioca to firm up any excess liquid inside. It won’t be solid like jello, but just won’t be soupy and run all over the plates.
- Serve with vanilla ice cream and some bourbon. It is fantastic, and was a total eye-opener for me. Delicious, flaky, fruity, spicy, and all from a bunch of green tomatoes in my garden. This pie may change your life. It did mine.
Recipe by WooPigFoodie at https://www.woopigfoodie.com/green-tomato-pie/