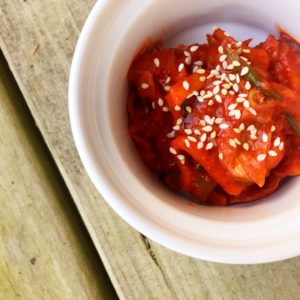
Easy Homemade Kimchi
Prep time
Total time
This is an easy recipe for a deliciously savory and spicy kimchi! You can find each of these ingredients in your local Asian grocery.
Author: WooPigFoodie
Serves: 3x32oz. jars
Ingredients
- 1 head Napa cabbage, about 4 pounds, chopped and salted with ¼ cup kosher salt
- 10 scallions/green onions, sliced crosswise into 1-3" inch long slices
- 6 inch daikon radish sliced into ⅛th inch thick rounds, then julienned into thin strips
- 2 carrots, julienned
- ½ onion chopped into rough chunks
- 2 inch chunk of ginger chopped into a rough dice
- 1 head of garlic, chopped into a rough dice (paper husks removed)
- 1¼ cups Korean coarse red pepper (not the stuff that folks put on pizza! See below.)
- ½ cup fish sauce (I like Three Crabs brand)
- ¼ cup glutinous (sweet) rice flour, which will be dissolved in 1.5 cups of water
- ⅛ cup sugar
Instructions
- Pick a good Napa cabbage. Look for one that has nice dark green leaves (it will be green from about the middle up, but still white below that). Buying a dark green one means that when you cut it open, the inside will be bright yellow, which I understand means it tastes better. If you can’t find one that is dark green on the outside, don’t worry. Just find the best-looking one you can find!
- Slice that cabbage in half lengthwise, and then slice those halves in half, lengthwise again. This leaves you with four long, equal quarters of a Napa cabbage. Now turn those four quarter to the side and cut them into cross sections, about two or three inches wide. Don’t cut them too narrow, because then you’ll end up with something like slaw, which is not what you want. You want to end up with squares or rectangles that can be a single bite.
- Drop the cut Napa cabbage into a basin of cold water. I use my largest mixing bowl. The point here is to clean off any dirt, but also to help the salt really make contact with the cabbage.
- Once the cabbage is rinsed, pour out the water and dump the cabbage onto a clean kitchen towel. Now you want to add the cabbage back to that mixing bowl, and as you do it, add a sprinkling of kosher salt to each layer. So, grab a handful of chopped cabbage, toss it in the mixing bowl, and dust over that a bit of the kosher salt. I find that I use about ¼ cup of kosher salt for each head of Napa cabbage—but note that my heads are about 3-4 pounds each. Don’t worry that this seems like a lot of salt. You will end up rinsing off the salt before you use the cabbage. The salt will draw out water from the cabbage, and make it soft and pliable, so that it can be bent into the jars without breaking.
- Keep layering the cabbage handfuls and the salt dustings until you have everything in the mixing bowl. If you have leftover salt, that is ok, just dump it on top. Now it’s time to mix the cabbage and salt up, so use your hands, and give the cabbage a good mixing. Don’t break up the cabbage, just try and turn it over a few times. Set the cabbage aside to soften for 1½ hours.
- While the cabbage is salting, let’s start chopping up the tasty bits that will also go in the kimchi. Here, we are looking for color, texture and taste, so I am using daikon radish—a white tubular radish that has a nice crisp texture and a clean radish flavor, scallions, white onion, garlic, ginger, and carrots. You can find each of these in your Asian grocery, likely very fresh and cheaper than they are in your regular grocery store.
- Take the daikon radish, give it a good rinse, and then slice it into ⅛” thin rounds. You want to use about 6” or so of the radish, give or take. There’s no hard and firm recipe, so if you want a greater ratio of tasty bits to cabbage, go ahead and add in more. Once you have the daikon sliced into rounds, stack several rounds and slice across the rounds to make ⅛” thin strips, which process the French call julienning. Set these aside in a pile for later.
- Also julienne your carrots, and chop both the white and green portions of your scallions (green onions) into 1-3” cross sections (I usually do the white portions in 1” cross sections and the green portions in longer cross sections). Take a 2” section of ginger, peel it, then chop it into a rough dice. Do the same for your garlic. It’s ok to approximate the sizes. Chop ½ of a white onion into rough chunks. Set these to the side.
- Once the chopping is done, it’s time to make the spice mixture that will coat the cabbage and chopped vegetables. Place a pot on your stove and add 1½ cups of water to it. Bring the water to a boil, and add in ¼ cup of glutinous sweet rice flour. (This is also in your Asian grocery, and the bag should say glutinous or sweet rice flour. A 2-cup bag will cost about $2. It looks like fine cornstarch.)
- Keep stirring for about 5 minutes, which will turn the mixture into a somewhat milky/somewhat clear mixture that is thick enough to coat a spoon. Turn down the heat to medium, add in ⅛ cup sugar and stir until the sugar is dissolved.
- Take the pot off the stove and cool it down. (An easy way to do this is to stop up one of your kitchen sinks and add enough water to come up about two inches up the side of your pot. Carefully set it in the sink so that it doesn’t topple over! Stir it while it cools.)
- Once the pot has cooled, pull out your blender or food processor. Add in the cooled sweet rice porridge, the fish sauce, the white onion, the ginger and the garlic. Don’t add in the daikon radish, scallions or the carrots!
- Add in 1 to 1¼ cups of Korean coarse red pepper. (The amount of red pepper you use is up to you. 1¼ cups will provide a nice,savory but still spicy kimchi. Real spice heads can go up from there. If you’ve never done this and don’t want to go too crazy the first time, maybe start with 1 cup for a 4 pound Napa cabbage. I bet you add more the next time!)
- Puree the items in your blender into a nice paste. if it is too thick, you can add a little bit of water.
- Pour the paste out of your blender into a bowl, and mix in the daikon radish, scallions, and carrots. Don’t yet add in the cabbage! This will become a chunky red paste with vegetables.
- After your cabbage has salted for 1½ hours, its time to rinse it. This part is very important. You want to thoroughly rinse the cabbage to remove the salt. I do this in my salad spinner basket in my sink. I pour in the cabbage, and keep rinsing it with water until the salt is removed, continually pouring water and flipping the cabbage with my hands. Most recipes say to wash the kimchi three times, but whatever you do, do it well. Then drain the cabbage to remove excess water. (I spin it in my salad spinner.)
- Now it’s time to fold everything together. Take the washed, drained cabbage and mix it with the chunky red paste with vegetables that you prepared above.
- Now it’s time to pack the kimchi into jars and get the fermentation process started. I’ve seen folks say that you don’t need to use sterilized jars because of the lactobacillus in the kimchi which kills off bad bacteria, but I do sterilize my jars in boiling water for 10 minutes. Once the jars are drained and cool, I fill them leaving about 1” of space at the top. (You will be glad you left that room once it starts fermenting! Otherwise it will spray like a shaken two-liter soda bottle when opened!) Make sure to take a fork and push down the contents to get out any air bubbles. Wipe the tops of the jars with a clean towel and close them up.
- You don’t want to put them back in boiling water like you would with traditional canning. That will kill the good bacteria. Instead, just leave them on your counter for about three days to get the fermentation started. After the first day or so, the kimchi will begin to come alive, and release liquid and start turning sour. That’s how you know the lactobacillus is working. How long it takes to do that depends upon Mother Nature and the temperature in your kitchen. I like to get it good and started and so I leave the covered jars in my kitchen for three days. After that, I keep them in the refrigerator, which slows down the lactobacillus activity. Kimchi will keep forever—seriously, people make kimchi that keeps for years. I make it in these smaller batches and keep it a few months. The taste keeps changing the longer it is around, becoming more sour. In the beginning, I liked it fresh, but I have grown to like all of its stages, especially the later sour stages!
Recipe by WooPigFoodie at https://www.woopigfoodie.com/easy-homemade-kimchi/