My Favorite Cherry Pie
Prep time
Cook time
Total time
A nice sweet-crusted fruit pie. You could swap out the cherries for another fruit, and just adjust the sugar to taste.
Author: WooPigFoodie, with a nod to Alton Brown and Joy of Cooking
Recipe type: Dessert
Serves: 8
Ingredients
- For the Filling:
- Three cans tart cherries (if you use sweet cherries, like Comstock's, omit or greatly reduce the sugar in the filling), reserving only about ½ cup of the juice
- 1¼ C white sugar
- I T fresh lemon juice
- 3 T cornstarch
- For the Dough:
- 1½ C all-purpose flour
- ½ teaspoon salt
- 6 T unsalted butter
- 2 T lard
- ¼ cup ice water
Instructions
- Put a metal cookie sheet into your freezer. If you have two, put two. You’ll be glad you did later, because you can swap them out and have less waiting. Get your pie tin into the freezer, too.
- Mix together all of the filling ingredients. Rest this in the refrigerator until you fill the pie.
- Time to make the pastry! The pastry is made up of all-purpose flour, salt, frozen unsalted butter, frozen lard and ice water. (Yes, I said lard. Lard is traditionally the soft white velvety fat that surrounds the kidneys of a pig. It doesn’t taste like pig, at all. And it’s lower in saturated fat and cholesterol than butter itself. That’s a win-win in my book.) We use frozen butter and lard because we don’t want them to melt until they hit the oven, and by working it with our hands and a rolling pin, it heats up the dough and would start to melt them early. Besides, the frozen shapes create pockets that will become flaky layers of buttery pastry….mmmmnnn….
- Mix the pie crust ingredients together in a large bowl. Pull it together with a spatula or spoon, not your hands. pulling it together. Make two balls; one for the bottom crust and one for the top.
- Get the dough into the freezer to rest for 15 minutes.
- After 15 minutes, it’s time to roll out the dough. Pull out one of the metal cookie sheets you put in your freezer. (You did do your mise-en-place, right?) Also pull out one ball of dough.
- Roll the dough out between two pieces of waxed paper over a frozen cookie sheet. That is a secret Grammy never told you. That way the dough stays as cold as possible while you work it, and it also doesn’t stick to your rolling pin, so you don’t have to use your hands to touch, and warm up, the dough. The pan will warm up somewhat quickly, so swap it out for your second frozen pan when you need to. Since you used wax paper on the top and bottom of the piecrust, you can easily slide under the other frozen pan.
- It’s time to form it into the pie pan. Don’t forget to trim the edges of the bottom pie crust to ¾ of an inch past the edge of the pie. You’ll need that edge for crimping, later. Once it is trimmed, get the pie crust back into the freezer for 15 minutes. You want to re-freeze the butter and lard that softened up while you worked the dough.
- Get your cookie pans back in the freezer because you will need them for the top crust.
- Pull the sour cherry pie filling out of the refrigerator. Use a slotted spoon to spoon the cherries into the pie. You want as little juice as possible, say only ¼ cup or so, or it will be a mess later on. If you get too much juice, make a slurry of cornstarch with about ¼ cup of juice and add it to the pie. That will thicken it up once it cooks.
- Dot the pie with chunks of ice cold butter.
- Now it’s time for the top crust. Pull out the top crust and roll it out just like before. If you have a fancy top cutter like I do, it makes for a pretty pie. If you are skilled with a knife, you can do it by hand. Or you can just lay the top crust over the pie, crimp it, and add three slits. That’s easy, and works just as well as fancy does. No one has ever turned down pie for looks.
- Time to crimp the edges together. I use the thumb and two fingers on my right hand and grab the edge of the top crust with the pad of my thumb, and the bottom crust with the pads of my first two fingers, and press them together. Then just circle the pie.
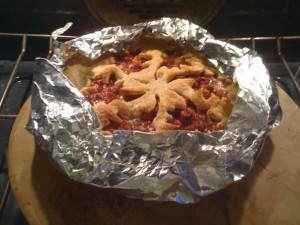
- Here’s a secret: brush the top with milk or egg and then a fine dusting of granulated sugar. It will brown up beautifully. This also means that you will need to make tin foil edge protectors and put them on the rim about 35 minutes into the baking, or you’ll end up with dark crunchy edges, which are not tasty at all. For this, you just take a 5” deep piece of tin foil, and fold it in half lengthwise into a 2.5” wide, double thick length of foil. Then curve that into a half-pie shape. Once you have enough of those to cover the whole edge of the pie, open the oven and very gingerly set them over the pie’s edges. Be careful because this is a hot process. You may want to use a pair of tongs or oven mitts to do this.
- Bake the pie at 425 degrees for the first 30 minutes, then add foil edge protectors and cook for the remaining 25-30 minutes at 350 degrees.
- Let the pie cool completely before serving. This helps the fruit to stick together. If you cut it too early, it will run. But that’s kind of fun, too.
Recipe by WooPigFoodie at https://www.woopigfoodie.com/making-a-cherry-pie/